Agisoft Metashape is a seriously powerful photogrammetry software package that lets you build stunning 3D models from just a bunch of photos. Think you can only do this with super-expensive equipment and years of training? Think again! Metashape makes creating realistic 3D models accessible to everyone, from hobbyists to professionals. It’s used across tons of fields, from architecture and archaeology to video game development, and it’s all thanks to its intuitive workflow and surprisingly robust feature set.
This guide will walk you through everything you need to know to get started and unlock the full potential of Agisoft Metashape.
We’ll cover the core functionality, explore different applications, dive into image requirements and workflow optimization, and even touch on some advanced techniques. We’ll also look at troubleshooting common issues and point you towards resources to keep learning and growing your skills. Get ready to transform your images into amazing 3D models!
Agisoft Metashape Functionality
Agisoft Metashape is a powerful photogrammetry software package used to create 3D models and textures from overlapping photographs. It’s popular among professionals and hobbyists alike due to its user-friendly interface and robust feature set, making it accessible even without extensive photogrammetry expertise. This means you can go from a bunch of photos to a detailed 3D model relatively easily.
Core Features of Agisoft Metashape
Agisoft Metashape boasts a comprehensive suite of tools covering the entire photogrammetry workflow. Key features include image alignment (finding common points between images), point cloud generation (creating a 3D representation of the scene), mesh generation (creating a 3D surface model), texture generation (applying realistic surface details to the model), and model optimization (improving the accuracy and quality of the final product).
It also supports various image formats, allowing for flexibility in input. Beyond the basics, advanced features like dense point cloud classification, orthomosaic creation (a georeferenced image mosaic), and different meshing algorithms provide users with considerable control over the final output. The software’s ability to handle large datasets is another significant advantage, making it suitable for projects ranging from small-scale object scanning to large-scale terrain mapping.
Workflow for Creating 3D Models
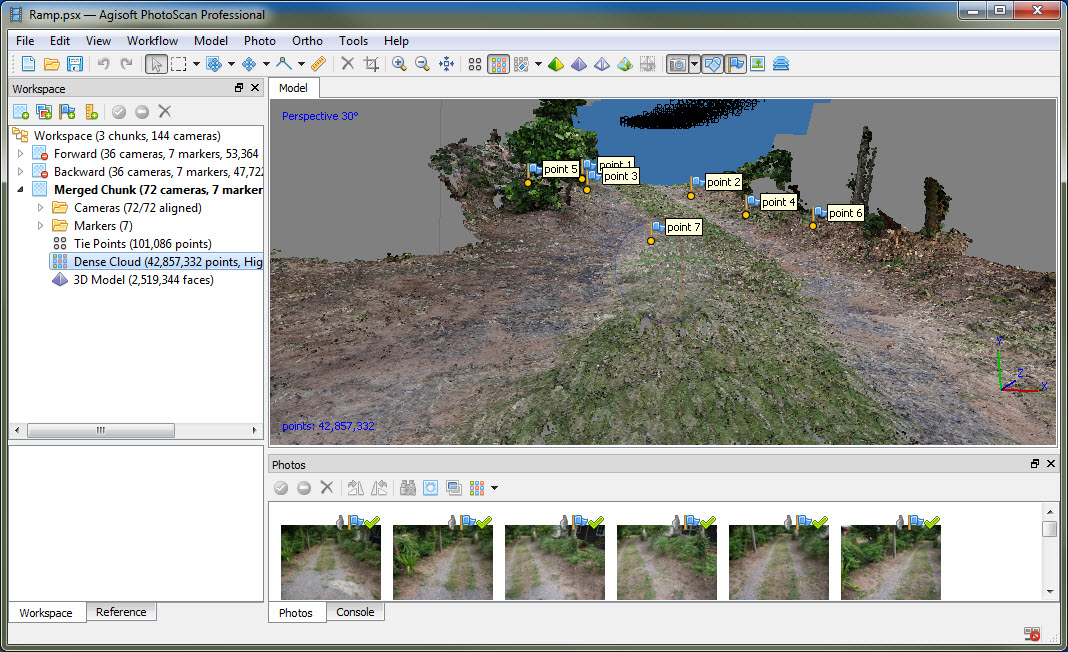
The typical workflow in Agisoft Metashape involves several key steps. First, you import your images. Then, the software aligns the images, identifying common features across them. This alignment process creates a sparse point cloud – a preliminary 3D representation of the scene. Next, you generate a dense point cloud, a much more detailed and accurate 3D representation.
From the dense point cloud, you can then create a mesh, a 3D surface model. Finally, you generate textures, applying the image data to the mesh to create a realistic-looking 3D model. Each step offers various parameters and settings to fine-tune the process, allowing users to optimize the results for their specific needs and the quality of their input images.
For example, you can adjust the alignment accuracy, the density of the point cloud, and the resolution of the texture.
Comparison with Other Photogrammetry Software
Agisoft Metashape competes with other photogrammetry software packages like RealityCapture and Pix4D. While all three offer similar core functionalities, differences exist in their user interfaces, pricing models, and specific features. Agisoft Metashape is often praised for its relatively user-friendly interface and competitive pricing, making it a good option for both beginners and experienced users. RealityCapture is known for its advanced features and accuracy, but it can have a steeper learning curve and higher price point.
Pix4D, on the other hand, focuses heavily on ease of use and automation, particularly for drone imagery. The best choice depends on individual needs and project requirements, considering factors like budget, technical expertise, and the specific characteristics of the dataset.
Step-by-Step Guide for Processing a Simple Dataset
Let’s imagine you’re creating a 3D model of a small statue using about 20 photos taken from various angles. First, you’d import these images into Agisoft Metashape. Then, you’d select the “Align Photos” option, letting the software automatically identify and match features in the images. Next, you’d generate a sparse point cloud. Once the sparse cloud is created, you’d build a dense cloud, increasing the detail.
Following this, you’d create a mesh from the dense cloud, choosing an appropriate meshing algorithm based on your desired level of detail and polygon count. Finally, you would generate textures, mapping the original images onto the 3D mesh. The resulting 3D model of the statue can then be exported in various formats, ready for further use in 3D modeling software or for 3D printing.
Agisoft Metashape is killer for photogrammetry, letting you build 3D models from photos. But sometimes you need more precise editing, which is where a program like rhino 3d comes in handy for detailed modeling and refinement. After you’ve got your initial model from Agisoft, you can import it into Rhino to really dial in the details and create a super polished final product.
The entire process, from image import to final model export, might take anywhere from a few minutes to several hours depending on the dataset size, computer processing power, and the chosen settings.
Agisoft Metashape Applications
Agisoft Metashape’s photogrammetry prowess makes it a versatile tool across many industries. Its ability to generate highly accurate 3D models from overlapping images opens up a world of possibilities, far beyond simple photography. We’ll explore some key applications and their benefits, highlighting both the advantages and limitations of using Metashape in these diverse fields.
Architectural Modeling with Agisoft Metashape
Agisoft Metashape is increasingly used in architectural modeling for several reasons. Architects can capture detailed as-built models of existing structures quickly and efficiently, using readily available cameras like drones or even high-resolution DSLR cameras. This data is invaluable for renovations, historical preservation, or simply creating highly accurate digital twins. The process involves capturing many overlapping photographs of the building from various angles, which Metashape then processes to create a 3D mesh and textured model.
This approach is significantly faster and often cheaper than traditional laser scanning methods, especially for complex or large structures. The resulting model can then be easily imported into CAD software for further manipulation and design work. This allows architects to make informed decisions based on precise measurements and visualizations.
3D Modeling for Video Games using Agisoft Metashape
The gaming industry is another significant user of Agisoft Metashape. Creating realistic environments for video games often requires incredibly detailed 3D models, and Metashape provides a powerful and efficient way to achieve this. By using high-resolution photographs of real-world locations or meticulously crafted sets, game developers can create realistic textures and geometry for their games. This allows for highly immersive and detailed game environments without the need for extensive manual modeling.
The photogrammetry approach is particularly useful for creating large, complex environments efficiently. Imagine recreating a historical city or a vast forest; Metashape’s ability to handle massive datasets makes it ideal for such projects. The generated models can then be optimized for game engines, resulting in visually stunning and believable game worlds.
Archaeological Site Documentation with Agisoft Metashape
Archaeological sites often present unique challenges for documentation. Traditional methods can be time-consuming and potentially damaging to delicate artifacts. Agisoft Metashape offers a non-destructive and efficient solution. By capturing images of the site from various angles, archaeologists can create highly accurate 3D models of the site, preserving its condition for future study. These models can be analyzed for patterns and features that might not be immediately apparent in the field.
Furthermore, the 3D models can be shared with researchers around the world, facilitating collaborative study and analysis. This non-invasive approach is especially valuable when dealing with fragile or sensitive archaeological sites. The digital record created with Metashape allows for detailed analysis and preservation of the site, even after physical access is limited or the site undergoes changes.
Comparison of Agisoft Metashape Applications
| Industry | Application | Advantages | Limitations |
|---|---|---|---|
| Architecture | As-built modeling, renovation planning, digital twins | Cost-effective, fast, highly accurate measurements, detailed textures | Requires sufficient image overlap, potential for inaccuracies in complex areas, post-processing required |
| Video Game Development | Environment creation, asset modeling | Realistic textures and geometry, efficient for large environments, reduces manual modeling time | Requires high-resolution images, computational resources needed for processing, model optimization for game engines |
| Archaeology | Site documentation, non-destructive recording, preservation | Non-invasive, detailed 3D models, facilitates collaborative research, digital preservation | Requires careful image planning, weather conditions can affect image quality, processing time can be significant |
Agisoft Metashape Image Requirements

So, you’re diving into the world of photogrammetry with Agisoft Metashape? Awesome! But before you start snapping away, let’s talk about getting the best possible results. The quality of your input images directly impacts the accuracy and detail of your final 3D model. Think of it like baking a cake – you wouldn’t expect a masterpiece from stale ingredients, right?
Similarly, using subpar images will yield a subpar 3D model.Optimal image parameters are crucial for a smooth and successful workflow in Agisoft Metashape. We’re talking about resolution, overlap, and overall image quality. Getting these right upfront saves you time and frustration down the line.
Image Resolution and its Impact on 3D Model Quality
Higher resolution images generally lead to higher quality 3D models. More pixels mean more detail captured, resulting in a richer, more textured final product. Think about it: a high-resolution image of a building will show individual bricks, window panes, and even small details like drainpipes. A low-resolution image of the same building might only show the overall shape, missing out on those finer points.
The trade-off, of course, is file size and processing time; higher resolution images take longer to process and require more storage space. A good balance needs to be struck depending on the project’s requirements and available resources. For example, a detailed architectural model might necessitate very high-resolution images, while a quick terrain model might be perfectly acceptable with lower resolution.
The Importance of Image Overlap in Photogrammetry Projects
Image overlap is absolutely essential for successful photogrammetry. Agisoft Metashape needs sufficient overlapping images to accurately align and stitch them together to create a 3D model. The general recommendation is a minimum of 60% overlap between adjacent images, both laterally and vertically. This allows the software to identify common features between images, ensuring accurate alignment and minimizing errors.
Less overlap can lead to gaps and inaccuracies in the final model, while excessive overlap increases processing time without necessarily improving the result. A well-planned flight plan or shooting strategy is key to achieving the right amount of overlap. For example, in aerial photography, using a drone with GPS-guided flight planning software can ensure consistent overlap throughout the project.
Checklist for Assessing Image Suitability for Agisoft Metashape Processing
Before you even think about importing your images into Agisoft Metashape, it’s a good idea to run a quick check to ensure they meet the basic requirements. This pre-processing step will save you a lot of headaches later on.
- Sufficient Resolution: Images should have enough resolution to capture the level of detail needed for the project. Consider the distance to the subject and the desired level of detail in the final model.
- Appropriate Overlap: Ensure at least 60% overlap between consecutive images, both laterally and vertically. This is critical for accurate point cloud generation.
- Good Lighting Conditions: Avoid images taken in harsh shadows or direct sunlight, as these can create uneven lighting and affect the accuracy of the model. Even lighting is key.
- Sharp Focus: Blurry images are useless in photogrammetry. Make sure all images are in sharp focus throughout the entire scene.
- Image Format Compatibility: Agisoft Metashape supports a wide range of image formats, but it’s best to stick with common formats like JPG, TIFF, or RAW for optimal compatibility and quality.
- Absence of Obstructions: Ensure the subject is clearly visible in the images and free from any significant obstructions that could hinder the processing.
- Consistent Camera Settings: If possible, use consistent camera settings throughout the image capture process. This ensures uniformity in image quality and helps the software process the images more efficiently.
Following this checklist helps ensure that your images are ready for Agisoft Metashape and will produce the best possible results. Remember, proper planning and image acquisition are just as important as the software itself.
Agisoft Metashape Workflow Optimization
Optimizing your Agisoft Metashape workflow is key to getting accurate results quickly and efficiently. This involves a multifaceted approach encompassing project setup, processing parameters, and leveraging hardware capabilities. By strategically employing these techniques, you can significantly reduce processing time and memory consumption, ultimately making your photogrammetry projects more manageable and less resource-intensive.
Efficient processing in Agisoft Metashape relies heavily on intelligent planning and the careful selection of processing parameters. Poorly planned projects or improperly configured settings can lead to significantly longer processing times and increased memory demands. Understanding the impact of various settings and adapting your approach to the specifics of your project is crucial for optimization.
Image Selection and Pre-processing
Careful selection of input images drastically impacts processing time and results. Removing blurry, out-of-focus, or poorly exposed images before importing them into Metashape is a crucial first step. Additionally, reducing the overall number of images, while ensuring adequate coverage, can lead to significant speed improvements. For instance, if you have many overlapping images, selecting a subset that maintains good overlap can drastically reduce processing time without sacrificing accuracy.
Pre-processing steps, such as correcting lens distortion using a known lens profile or performing basic image adjustments for brightness and contrast, can also streamline the subsequent processing stages.
Alignment and Mesh Generation Parameters
The alignment and mesh generation stages are computationally intensive. Optimizing these steps requires careful consideration of several parameters. For example, using a higher accuracy setting will result in a more accurate model but will increase processing time. Experimentation to find the optimal balance between accuracy and speed is crucial. Similarly, adjusting the keypoint limit and tie point limit can significantly impact processing time.
Lowering these limits can speed up the process, but might result in a less accurate alignment, especially with challenging datasets. Selecting the appropriate mesh generation parameters, such as the face count and the quality settings, also significantly impacts both processing time and the final model quality.
Memory Management
Metashape’s memory usage can be substantial, especially when dealing with high-resolution imagery or large datasets. Effective memory management involves several strategies. One key technique is to utilize the “Save Project” function frequently during processing to save intermediate results. This prevents losing progress in case of unexpected interruptions or crashes. Furthermore, closing unnecessary applications and freeing up system RAM before starting a Metashape project can provide additional headroom for the software.
Considering the use of a system with sufficient RAM is essential, particularly for large projects. For extremely demanding projects, utilizing a machine with multiple high-capacity RAM sticks can significantly improve performance.
GPU Acceleration
Leveraging GPU acceleration is arguably the most impactful method for speeding up Agisoft Metashape workflows. Metashape effectively utilizes the parallel processing power of modern GPUs to accelerate computationally intensive tasks such as alignment, mesh generation, and texture generation. Ensuring that your graphics card drivers are up-to-date and that Metashape is properly configured to use your GPU is critical.
A powerful GPU with ample VRAM (video RAM) is essential for achieving significant speed improvements, especially with large datasets and high-resolution imagery. The speed increase achieved through GPU acceleration can often be several times faster than CPU-only processing, making it a vital aspect of workflow optimization. For example, a project that takes several hours to process on a CPU might complete in under an hour with a suitable GPU.
Agisoft Metashape Data Output
Okay, so you’ve built your awesome 3D model in Agisoft Metashape. Now what? Time to export your hard work! Agisoft offers a variety of output formats, each with its own strengths and weaknesses. Choosing the right one depends entirely on what you plan to do with your model. Let’s break down the options and help you pick the perfect export format for your project.Agisoft Metashape provides a robust selection of export options, allowing users to tailor the output to their specific needs.
The choice of output format significantly impacts the file size, processing time for subsequent applications, and the level of detail preserved in the final product. Understanding the characteristics of each format is crucial for efficient workflow management.
Supported Output Formats and Their Characteristics
Agisoft Metashape supports a wide range of 3D model and texture formats. These include formats optimized for different applications, from simple visualization to complex analysis. The selection process often involves considering factors such as file size, level of detail, and compatibility with downstream software. Commonly used formats include: .ply, .obj, .fbx, .dae, and various raster image formats for textures.
Comparison of Output Formats: Advantages and Disadvantages
Let’s compare some popular choices. .PLY (Polygon File Format) is a widely supported, relatively simple format, good for general use and easy importing into other software. However, it can be less efficient for very large models. .OBJ (Wavefront OBJ) is another common choice, offering good compatibility but lacking some features found in more advanced formats. .FBX (Autodesk FBX) is a powerful format supporting animation and more complex data, ideal for game engines or animation software.
However, it can create larger files. .DAE (Collada) is an open standard format that’s widely compatible, but it might not support all features of a Metashape model. The best choice truly depends on your intended application.
Common File Formats and Their Suitability for Specific Applications
Choosing the right file format is crucial for optimal performance and compatibility. Here’s a breakdown:
- .ply (Polygon File Format): Suitable for general 3D model viewing and manipulation in various software packages. Relatively small file size for simple models.
- .obj (Wavefront OBJ): Widely compatible, often used for 3D printing and basic visualization. Can be easily imported into many CAD and 3D modeling programs.
- .fbx (Autodesk FBX): Ideal for game development, animation, and applications requiring complex data such as animation and material properties. Supports a high level of detail, but files can be quite large.
- .dae (Collada): A good option for cross-platform compatibility and web-based applications. Supports various features but might not be as feature-rich as .fbx.
- Raster Images (e.g., .tif, .png, .jpg): Used for exporting textures generated from the model. The choice depends on the desired image quality and file size. .tif offers high quality and lossless compression, while .jpg provides smaller file sizes with lossy compression.
- .las (LASer point cloud): For point cloud data, this is a standard format for LiDAR data. Ideal for GIS and point cloud processing applications.
Agisoft Metashape and Hardware

So, you’ve got your images, you’ve processed them through Metashape’s workflow, and now you’re ready for the big reveal – your 3D model. But wait! Before you hit that “Process” button, let’s talk about the unsung heroes of photogrammetry: your computer’s hardware. The speed and efficiency of your Agisoft Metashape projects are directly tied to the power of your machine.
Choosing the right hardware can mean the difference between a quick turnaround and a project that takes days (or even weeks!).Agisoft Metashape’s performance is heavily reliant on several key hardware components. The interplay between your CPU, RAM, and GPU significantly impacts processing time, especially when dealing with large datasets or high-resolution images. Understanding these relationships is crucial for optimizing your workflow and avoiding frustrating delays.
Minimum System Requirements
Agisoft Metashape’s official minimum system requirements are a good starting point, but they represent the bare minimum for basic functionality. Falling below these specs might lead to sluggish performance, frequent crashes, or even the inability to process larger projects. These minimums typically include a reasonably modern multi-core CPU (e.g., Intel Core i5 or AMD Ryzen 5 equivalent), at least 8GB of RAM, a dedicated GPU with at least 2GB of VRAM, and a substantial amount of hard drive space (consider an SSD for faster processing).
Remember that these are
minimums* – aiming higher is always better.
Impact of Hardware Components on Processing Speed
The CPU acts as the brain of the operation, handling the complex calculations involved in image alignment and model building. A faster, multi-core CPU will significantly reduce processing times, especially for larger projects with many images. RAM is the short-term memory, and insufficient RAM can lead to excessive swapping to the hard drive, drastically slowing down the process.
More RAM is generally better, especially when working with high-resolution images. Finally, the GPU accelerates certain processing steps, particularly those involving texture generation and mesh refinement. A powerful GPU with ample VRAM can dramatically speed up these tasks, especially when working with dense point clouds.
Recommendations for Choosing Suitable Hardware
For most photogrammetry projects, a system exceeding the minimum requirements is highly recommended. Aim for a system with a powerful multi-core CPU (e.g., Intel Core i7 or AMD Ryzen 7 or better), at least 16GB of RAM (32GB or more is ideal for larger projects), and a dedicated GPU with at least 4GB of VRAM (8GB or more is strongly recommended for high-resolution images and large datasets).
Consider an SSD for your operating system and project files; the speed difference compared to a traditional HDD is substantial.
Hardware Specifications and Processing Time
The following table provides a general overview of how different hardware configurations can affect processing times for various project sizes. Note that these are estimates, and actual processing times can vary depending on image quality, overlap, and other factors.
| Project Size (Number of Images) | Hardware Configuration (CPU, RAM, GPU VRAM) | Estimated Processing Time (Alignment) | Estimated Processing Time (Meshing/Texturing) |
|---|---|---|---|
| 100 | Intel Core i5, 8GB RAM, 2GB VRAM | 30-60 minutes | 15-30 minutes |
| 500 | Intel Core i7, 16GB RAM, 4GB VRAM | 2-4 hours | 1-2 hours |
| 1000+ | AMD Ryzen 9, 32GB RAM, 8GB VRAM | 8-16 hours | 4-8 hours |
Agisoft Metashape Error Handling

Okay, so you’ve dived into the world of photogrammetry with Agisoft Metashape, and things aren’t always going smoothly. That’s totally normal! Photogrammetry is a complex process, and even with the best planning, errors can pop up. This section covers common Metashape errors, their causes, and how to troubleshoot them to get your models looking sharp. We’ll also look at strategies to prevent issues before they even arise.Agisoft Metashape, while powerful, can throw some cryptic error messages.
Understanding these messages is key to fixing the underlying problems. Many errors stem from issues with image quality, processing settings, or insufficient computer resources. Let’s break down some of the most frequent offenders and how to deal with them.
Common Agisoft Metashape Errors and Their Causes
Several factors can lead to processing failures in Agisoft Metashape. These range from simple issues like insufficient image overlap to more complex problems related to image quality or hardware limitations. Understanding these causes is the first step toward effective troubleshooting. For example, a lack of sufficient image overlap will prevent the software from correctly aligning images, resulting in a sparse point cloud or failure to generate a mesh.
Similarly, poorly exposed or blurry images can lead to processing errors, and insufficient RAM or processing power can cause crashes or extremely slow processing times.
Troubleshooting Agisoft Metashape Errors
When an error occurs, Metashape usually provides an error message. This message often points to the source of the problem. However, sometimes the message might be unclear. In such cases, checking the log files can provide more detailed information. The log files usually contain timestamps and detailed error messages, allowing you to pinpoint the exact step where the process failed.
For example, an error message indicating “insufficient keypoints” suggests a problem with image matching, potentially caused by poor image quality, insufficient overlap, or incorrect processing parameters. Reviewing the image quality and adjusting parameters like keypoint limit and tie point limit might resolve this.
Best Practices for Preventing Errors in Agisoft Metashape Workflows
Proactive steps can significantly reduce the frequency of errors. Careful planning and execution are essential. This includes ensuring sufficient image overlap (generally 60-80%, but this can vary depending on the project and the camera used), using high-quality images with good exposure and minimal motion blur, and selecting appropriate processing parameters based on your data and hardware capabilities. Always start with a small test dataset before processing your entire project to identify potential issues early.
Furthermore, regularly backing up your project files is crucial to avoid data loss in case of unexpected crashes or errors.
Interpreting Agisoft Metashape Error Messages and Logs
Agisoft Metashape error messages are often concise, sometimes cryptic. The log files provide more context. Let’s say you encounter an “Out of memory” error. This clearly indicates insufficient RAM. The log file might further specify the exact memory usage at the point of failure.
Similarly, an error related to “incorrect camera parameters” suggests issues with the camera’s internal parameters, possibly requiring recalibration or using more accurate camera parameters. Careful examination of both the error messages and log files is vital for efficient troubleshooting. The logs can provide detailed information on the processing steps, the number of tie points generated, and the overall processing progress, which helps in identifying the exact stage where the error occurred.
Agisoft Metashape Advanced Techniques
Okay, so you’ve mastered the basics of Agisoft Metashape – congrats! Now let’s dive into some seriously powerful features that’ll take your 3D modeling game to the next level. We’re talking about techniques that let you create incredibly detailed and accurate models, automate tedious tasks, and generally unleash the full potential of this software.Mesh editing and texture painting are two key areas where you can really refine your models.
Think about it: you’ve got your initial model, but it might have some imperfections – holes, jagged edges, or textures that aren’t quite right. This is where the advanced tools come in.
Mesh Editing
Agisoft Metashape provides a suite of tools for manipulating the mesh directly. You can seamlessly fill holes, smooth out rough surfaces, and even sculpt the model to achieve a more refined aesthetic. Imagine you’re working on a model of a historical building; you might need to carefully reconstruct a damaged section of the facade using the mesh editing tools.
These tools allow for precise adjustments, ensuring the final model is accurate and visually appealing. Specific tools include things like the selection tools for isolating problem areas and various smoothing algorithms to remove noise or artifacts from the mesh. The ability to seamlessly integrate these edits with the underlying point cloud also ensures that your changes remain grounded in the original data.
Texture Painting
Once you’ve got your mesh looking sharp, it’s time to add some color! Metashape’s texture painting capabilities let you directly paint onto the model’s surface, adding details and correcting imperfections in the automatically generated textures. This is especially helpful when dealing with models where the initial texture generation might not be perfect. For example, if you’re modeling a car, you might use texture painting to add details like scratches or logos that weren’t captured in the original images.
The process is similar to using a digital painting program, allowing for precise control over color, opacity, and brush size.
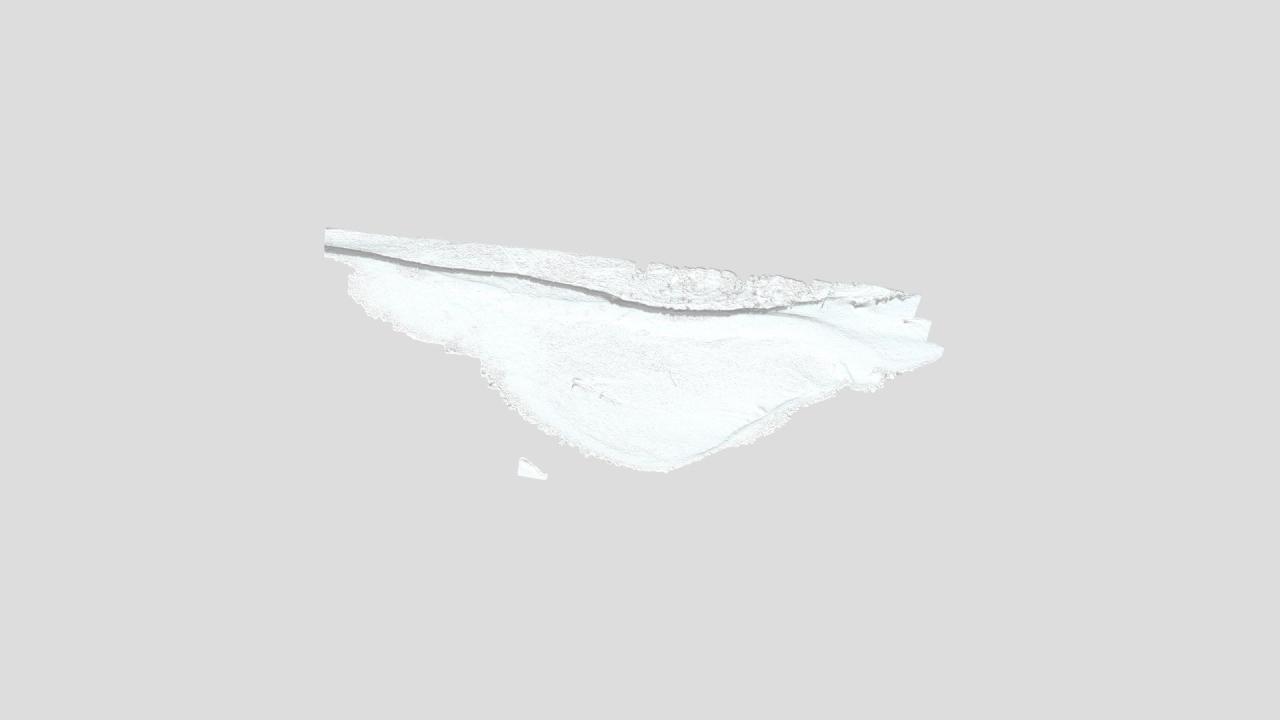
Dense Point Clouds and Highly Detailed 3D Models
Dense point clouds are the backbone of high-quality 3D models in Metashape. The higher the density of the point cloud, the more detail you capture. Think of it like taking a super high-resolution photograph: the more pixels, the more detail you see. These dense point clouds are essential for creating realistic models with intricate details, particularly useful for applications like architectural modeling, archaeology, and forensic investigations where accurate measurements and fine details are paramount.
For example, a dense point cloud of a historical artifact would allow researchers to measure minute details and imperfections, providing valuable insights into its history and creation.
Camera Model Implementation and Accuracy
Metashape offers a variety of camera models, each with its own strengths and weaknesses. Choosing the right model is crucial for achieving accurate results. The default generic camera model is often sufficient, but for highly precise work, or when dealing with specialized cameras, you might need to use a more sophisticated model. Using the wrong camera model can lead to distortions and inaccuracies in the final 3D model.
The selection depends heavily on the type of camera used and the level of accuracy required. For example, using a calibrated camera model with precise lens parameters will improve the accuracy significantly compared to a generic model.
Agisoft Metashape Scripting for Automation
One of Metashape’s often-overlooked gems is its scripting capabilities. You can automate repetitive tasks, such as processing batches of images or generating reports, using Python. This significantly speeds up your workflow and reduces the risk of human error. Imagine processing hundreds of images from a drone survey – scripting can automate the entire process from image alignment to mesh generation, saving you countless hours of manual work.
A simple script could automatically process a directory of images, generating a 3D model and orthomosaic for each project, drastically improving efficiency.
Agisoft Metashape Community and Support
Navigating the world of photogrammetry can feel like venturing into uncharted territory, but thankfully, you don’t have to go it alone. A robust community and comprehensive support system surrounds Agisoft Metashape, ensuring users of all skill levels can find the help they need to succeed. This section explores the various resources available to expand your Metashape knowledge and troubleshoot any challenges you encounter.The Agisoft Metashape community is a valuable asset, offering a wealth of information and support to users worldwide.
This network fosters collaboration, allowing users to share their experiences, tips, and solutions. Direct access to experienced professionals and the collective wisdom of the community is invaluable for overcoming technical hurdles and accelerating your learning curve.
Agisoft Metashape Official Support Channels
Agisoft provides several avenues for direct support. Their website features extensive documentation, including tutorials, FAQs, and a detailed user manual. They also offer a dedicated support ticket system for users facing more complex issues. Response times vary depending on the urgency and complexity of the problem, but generally, you can expect a timely and helpful response from their support team.
This official support ensures you receive accurate and reliable information directly from the source.
Online Forums and Communities
Beyond Agisoft’s official channels, several online forums and communities are dedicated to Agisoft Metashape. These platforms provide a space for users to ask questions, share tips and tricks, and discuss various aspects of the software. Participation in these communities allows you to learn from others’ experiences, discover workarounds for common problems, and potentially find solutions to issues you might not have considered.
Active participation in these online forums is a great way to continuously improve your skills and stay updated on the latest developments in Metashape.
Relevant Websites, Tutorials, and Documentation
Finding reliable information is key to mastering Agisoft Metashape. Here’s a curated list of valuable resources:
- Agisoft Metashape Website: This is your primary source for official documentation, tutorials, and software downloads. Expect to find detailed explanations of features, step-by-step guides, and frequently asked questions.
- Agisoft Metashape User Manual: A comprehensive guide covering all aspects of the software, from basic operations to advanced techniques. This is an essential resource for in-depth understanding.
- YouTube Tutorials: Numerous YouTube channels offer Metashape tutorials, ranging from beginner-level introductions to advanced workflows. Searching for specific tasks or techniques will yield a plethora of video guides.
- Online Forums (e.g., GIS Stack Exchange, Reddit’s r/photogrammetry): These forums provide platforms for asking questions, seeking advice, and sharing experiences with other Metashape users. The collective knowledge within these communities is invaluable.
- Blog Posts and Articles: Many websites and blogs dedicated to photogrammetry and 3D modeling feature articles and tutorials on using Agisoft Metashape. These resources often offer practical examples and insights.
Ultimate Conclusion
From basic image processing to advanced techniques like mesh editing and scripting, Agisoft Metashape empowers you to create high-quality 3D models for a wide range of applications. We’ve covered the essential aspects of using Metashape, from understanding image requirements to optimizing workflows and troubleshooting common errors. By leveraging its capabilities and exploring the vast resources available, you can unlock your creative potential and bring your 3D modeling projects to life.
So grab your camera, start snapping, and let the power of photogrammetry amaze you!
Essential FAQs
What’s the difference between Agisoft Metashape and other photogrammetry software?
Agisoft Metashape stands out due to its user-friendly interface, powerful features, and wide range of supported file formats. While other software may specialize in specific niches, Metashape offers a good balance of versatility and ease of use.
Is Agisoft Metashape free?
No, Agisoft Metashape is commercial software. However, they offer a free trial, and you can explore their website for licensing options.
Can I use Agisoft Metashape on a Mac?
Yes, Agisoft Metashape is available for both Windows and macOS operating systems.
How much RAM do I need for Agisoft Metashape?
The required RAM depends on the size and complexity of your project. More RAM is generally better, especially for large datasets. Check their system requirements for a baseline, but 16GB or more is recommended for anything beyond small projects.
Where can I find tutorials and support for Agisoft Metashape?
Agisoft provides excellent documentation on their website, and you’ll find a ton of helpful tutorials on YouTube and other online platforms. Their community forums are also great resources for troubleshooting and getting help from other users.