7zip Mac isn’t just another compression tool; it’s your Swiss Army knife for all things file management on a Mac. This guide dives deep into everything from basic installation to advanced command-line tricks, helping you unlock the full potential of this powerful, free, and surprisingly versatile program. Whether you’re a seasoned pro or a total newbie, get ready to master 7zip and streamline your digital life.
We’ll cover the nitty-gritty of installation, explore the intuitive interface, and delve into the different compression algorithms 7zip offers. We’ll even show you how to secure your files with passwords, optimize performance, and troubleshoot any hiccups along the way. Think of this as your all-access pass to becoming a 7zip Mac guru.
7-Zip Mac Installation Methods
Okay, so you wanna get 7-Zip up and running on your Mac? It’s a pretty straightforward process, but there are a few different ways to do it, each with its own pros and cons. We’ll walk through the most common methods, focusing on both official and unofficial routes.
The best approach depends on your comfort level with software installation and your priorities regarding security. Sticking to official channels minimizes risk, while alternative sources might offer convenience but introduce potential vulnerabilities.
Official 7-Zip Installer Installation
Installing 7-Zip using the official installer is the safest and generally easiest method. This ensures you’re getting the genuine software, free from malware or unwanted modifications. Here’s a step-by-step guide:
- First, navigate to the official 7-Zip website (be careful of imitations!). Download the macOS installer package (.dmg file). The download should be a relatively small file size, usually under 10MB. Larger files are a potential red flag.
- Once downloaded, locate the .dmg file and double-click it. This will mount the disk image, revealing the 7-Zip installer application.
- Drag the 7-Zip application icon into your Applications folder. This will copy the application to the designated location on your system.
- Finally, you can launch 7-Zip from your Applications folder. You might need to right-click and select “Open” the first time you launch it, bypassing macOS’s security gatekeeper warning.
Installation from Alternative Sources
While the official method is recommended, some users might find 7-Zip on unofficial websites or app stores. This approach introduces several risks. You could unknowingly download malware or a modified version of 7-Zip with hidden malicious code.
Unofficial sources often lack version control and updates. This means you might be using an outdated version vulnerable to security exploits or missing critical bug fixes. The ease of access from unofficial sources doesn’t outweigh the significant security concerns.
Comparison of Installation Methods
| Method | Ease of Use | Security |
|---|---|---|
| Official Installer | Very Easy | High |
| Alternative Sources | Potentially Easy (but could be more difficult if the source is unreliable) | Low |
In summary, using the official installer is the best practice for installing 7-Zip on macOS. While alternative methods might seem convenient, they significantly increase the risk of malware and other security issues. The small extra time investment in finding and using the official installer is well worth the security benefits.
7-Zip Mac Interface and Functionality
-Zip’s macOS interface is pretty straightforward, even if you’re not a coding whiz. It’s designed to be intuitive and user-friendly, making zipping and unzipping files a breeze. Think of it as a simple, no-frills tool that gets the job done efficiently. You won’t find flashy graphics or complex menus, but you will find everything you need to manage your compressed files.The main window presents a classic file manager-style interface.
You’ll see a list of files and folders, with options to select, add, delete, and perform compression or extraction operations. Navigation is simple: you use standard drag-and-drop functionality to add files to a compression task, and the context menu (right-click) offers options for creating archives or extracting their contents. The interface focuses on practicality over visual flair.
Creating Compressed Archives
To create a 7z archive, you simply select the files or folders you want to compress. Then, right-click and choose “Add to Archive.” A dialog box appears where you can select the archive type (7z is recommended for its high compression ratio), specify the compression level (Normal is usually a good balance between speed and compression), and choose the archive’s name and location.
It’s a simple, step-by-step process. For example, if you want to compress a folder of images for easier sharing, you’d select the image folder, right-click, choose “Add to Archive,” and configure the settings before clicking “OK.”
Extracting Compressed Archives
Extracting archives is equally easy. Locate the compressed file (typically ending in .7z), right-click on it, and select “Extract Here” to extract the contents to the same folder, or “Extract Files…” to specify a different destination. 7-Zip will automatically handle the extraction process, and you’ll find your original files in the chosen directory. Suppose you received a .7z file containing important documents; simply right-click, choose “Extract Files…”, browse to your desired location, and click “OK” to extract them.
Managing Compressed Archives
-Zip allows for basic archive management. You can rename, delete, or move compressed files just like any other file on your system. However, 7-Zip itself doesn’t offer advanced features like viewing archive contents without extraction or built-in file viewers. It’s primarily a compression and extraction utility.
Compression Ratio Examples for Different File Types
The compression ratio you achieve depends on the file type and the compression level used. Lossless compression methods, like those used by 7-Zip, work best on files with repetitive data. Here’s a table illustrating approximate compression ratios. These are estimates, and actual results may vary based on the specific file content and compression settings.
So, 7zip for Mac is awesome for archiving stuff, right? But sometimes your system gets bogged down, and that’s where grabbing a copy of ccleaner free download comes in handy. It’s a total lifesaver for clearing out junk files, freeing up space, and making sure your Mac runs smoothly again, which is essential before you start compressing massive files with 7zip.
| File Type | Original Size (Example) | Compressed Size (7z, Normal) (Example) | Approximate Compression Ratio |
|---|---|---|---|
| Text Document (.txt) | 10 KB | 2 KB | 5:1 |
| Image (JPEG) | 5 MB | 2 MB | 2.5:1 |
| Image (PNG) | 10 MB | 4 MB | 2.5:1 |
| Video (MP4) | 1 GB | 400 MB | 2.5:1 |
| PDF Document | 2 MB | 1 MB | 2:1 |
7-Zip Mac Compression Algorithms
-Zip for macOS boasts a robust suite of compression algorithms, each offering a unique balance between compression ratio (how much smaller the file becomes) and compression speed. Choosing the right algorithm depends on your priorities: do you need the smallest possible file size, or is speed more important? Let’s dive into the specifics of some of the most commonly used algorithms.
The core algorithms offered by 7-Zip provide a range of options for different file types and user needs. Understanding the strengths and weaknesses of each will help you optimize your compression process for maximum efficiency.
LZMA
LZMA (Lempel-Ziv-Markov chain Algorithm) is a powerful algorithm known for its excellent compression ratios. It’s a relatively complex algorithm, which means it takes longer to compress and decompress files compared to simpler methods. However, the significant reduction in file size often outweighs the increased processing time, especially for large files or those containing repetitive data like text documents or source code.
LZMA is a solid all-around choice when high compression is the primary goal.
LZMA2
LZMA2 is an improved version of LZMA, designed to address some of its limitations. While still providing strong compression, LZMA2 offers significant performance improvements, particularly in speed. It achieves this by using a more efficient encoding scheme and employing multi-threading capabilities, allowing it to leverage multiple processor cores for faster compression and decompression. This makes LZMA2 a good compromise between compression ratio and speed.
For many users, LZMA2 strikes a great balance.
PPMd
PPMd (Prediction by Partial Matching) is a different type of algorithm that employs a probabilistic model to predict the next byte in a data stream. This approach leads to very high compression ratios, often exceeding those of LZMA, but at the cost of significantly slower compression and decompression speeds. PPMd is best suited for archiving situations where storage space is extremely limited and processing time is less critical.
It shines when dealing with highly compressible data, but might not be the best choice for everyday use.
Comparison of Algorithms
The following table summarizes the strengths and weaknesses of each algorithm. Keep in mind that actual performance can vary depending on the type of data being compressed.
| Algorithm | Compression Ratio | Speed | Strengths | Weaknesses |
|---|---|---|---|---|
| LZMA | Excellent | Slow | High compression ratio, suitable for large files | Slow compression and decompression speed |
| LZMA2 | Very Good | Fast | Good balance between compression ratio and speed, multi-threaded | Compression ratio slightly lower than LZMA |
| PPMd | Exceptional | Very Slow | Highest compression ratio among these three | Extremely slow compression and decompression speed |
7-Zip Mac Security Features
- -Zip for macOS, while not boasting the flashy bells and whistles of some commercial archiving software, provides a solid suite of security features to protect your data. Its strength lies in its straightforward, reliable encryption and integrity verification methods. This makes it a dependable choice for users who prioritize security without needing a complex learning curve.
- -Zip’s primary security feature is its robust password protection for archives. This ensures that only authorized users with the correct password can access the contents of a compressed file. This protection relies on strong encryption algorithms, offering a significant layer of security against unauthorized access. Beyond password protection, the integrity of the downloaded 7-Zip application itself is crucial for maintaining overall security.
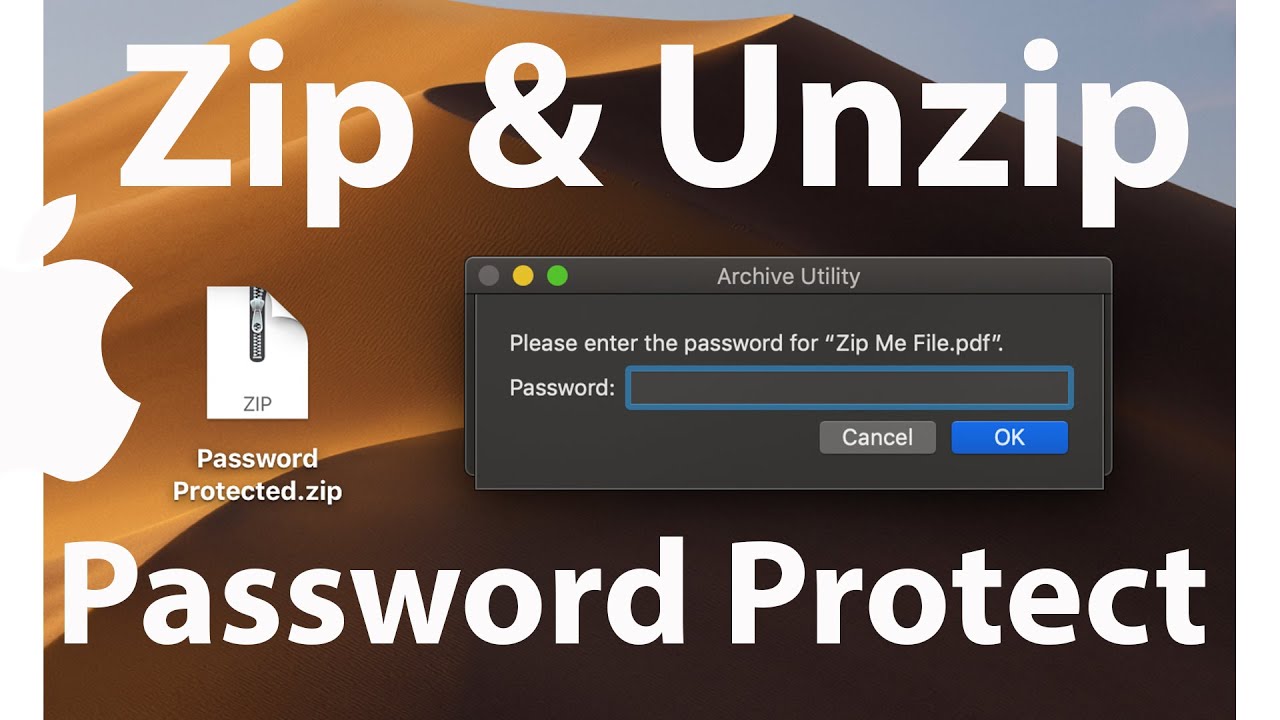
Password Protection for Archives
Setting a password for an archive in 7-Zip is a simple process. When creating a new archive, you’ll typically find a “Set Password” or similar option. After selecting the encryption method (7-Zip usually defaults to AES-256), you’ll be prompted to enter and confirm your password. Strong passwords are crucial here – think of a combination of uppercase and lowercase letters, numbers, and symbols.
Avoid easily guessable passwords like birthdays or common words. A longer password increases the time it would take for a brute-force attack to crack it. Once the password is set, the archive is encrypted, and accessing it requires entering the correct password. If the wrong password is entered repeatedly, some versions of 7-Zip might even temporarily block access to prevent brute-force attempts.
Verifying the Integrity of Downloaded 7-Zip Files
Ensuring the downloaded 7-Zip installer is legitimate and hasn’t been tampered with is paramount. While 7-Zip itself doesn’t offer a built-in checksum verification tool, you can use independent tools to verify the integrity of downloaded files. This process involves comparing a checksum (a digital fingerprint of the file) generated by your downloaded file with the checksum provided by the official 7-Zip website.
A mismatch indicates that the downloaded file has been altered or corrupted, potentially containing malware. Many operating systems offer built-in tools for checksum verification, or you can use free, third-party utilities. The most common checksum algorithms are MD5 and SHA-256. The official 7-Zip download page usually provides these checksums alongside the download links. If the checksums match, you can be more confident that the downloaded file is genuine and hasn’t been compromised.
7-Zip Mac File Management
Okay, so you’ve got 7-Zip installed and you’re ready to wrangle your digital chaos. Let’s talk about using its awesome archiving powers to manage massive file collections and make backups a breeze. We’ll cover efficient archiving techniques, a step-by-step backup plan, and how to split those monster files into more manageable chunks.Managing large numbers of files can be a total headache, especially when you’re dealing with gigabytes of data.
7-Zip’s compression and archiving features offer a streamlined way to organize and handle these files effectively. By creating archives, you can group related files together, reducing clutter and making it easier to locate specific items. This is particularly helpful for projects, photos, or any large dataset. Plus, compression saves you valuable disk space.
Archiving Large File Collections for Efficient Management
Let’s say you have a ton of photos from a recent trip – hundreds of gigabytes worth. Instead of leaving them scattered across your hard drive, you can use 7-Zip to create a single, well-organized archive. First, select all the photo files. Then, right-click and choose “7-Zip” followed by “Add to archive…”. In the archive settings window, choose a compression level (higher levels mean smaller file size but longer processing time) and give your archive a descriptive name (like “TripToHawaii_2024”).
Now all those photos are neatly packaged into one easily manageable file. You can repeat this process for different projects or types of files, keeping your digital life organized. Think of it as creating digital filing cabinets – super efficient!
Creating a Backup Schedule with 7-Zip
Backing up your important files is crucial. 7-Zip makes it simple. Here’s a straightforward backup schedule you can follow:
- Identify Critical Files: Determine which files need backing up (documents, photos, projects, etc.).
- Choose a Backup Destination: Select an external hard drive, cloud storage, or network location. Make sure you have enough space!
- Create a Backup Archive: Use 7-Zip to create a compressed archive of your critical files. Consider using a strong password to protect your data.
- Establish a Schedule: Set a regular schedule (daily, weekly, monthly) for creating new backups. You can automate this with a task scheduler or calendar reminder. Remember, the frequency depends on how often your files change.
- Test Your Backups: Periodically test your backups to ensure they’re working correctly. Try restoring a few files to verify data integrity.
Regular backups are your best defense against data loss. Think of it like insurance – you hope you never need it, but when you do, you’ll be incredibly grateful you have it.
Splitting Large Files into Smaller Parts
Sometimes you need to transfer a huge file, but your email or storage service has size limits. 7-Zip lets you split a file into smaller, more manageable parts. When creating an archive, you’ll find a “Split to volumes, bytes” option. Specify the desired size for each part (e.g., 1GB). 7-Zip will then create multiple archive files, all of which are needed to reconstruct the original.
This is a lifesaver for transferring massive datasets over networks with bandwidth restrictions or sending large files via email. For example, a 10GB video file could be split into ten 1GB parts for easier transfer.
7-Zip Mac Troubleshooting

Okay, so you’ve downloaded 7-Zip for your Mac and are ready to zip and unzip files like a pro. But sometimes, things don’t go as planned. This section covers some common headaches you might run into and how to fix them. Think of it as your 7-Zip Mac first-aid kit.Troubleshooting 7-Zip on macOS often involves checking file permissions, ensuring compatibility with the archive format, and verifying the integrity of your downloaded files.
Let’s dive into some specific scenarios.
File Extraction Errors
-Zip might refuse to extract files due to several reasons. The most common culprit is file corruption during download or transfer. Another possibility is that the archive uses a compression method 7-Zip doesn’t support, or that the archive is password-protected but you’ve entered the wrong password. Finally, insufficient disk space can also prevent extraction.To troubleshoot this, first try re-downloading the archive from a trusted source.
If that doesn’t work, check if 7-Zip supports the archive’s format (e.g., RAR, 7z, ZIP). If it’s password-protected, double-check the password. Lastly, make sure you have enough free space on your hard drive.
File Compression Failures
Sometimes, 7-Zip will fail to compress files. This could stem from insufficient permissions to access the files you’re trying to compress, a corrupted or damaged source file, or even a bug in 7-Zip itself. Trying to compress a file that’s already open in another application can also cause issues.To address compression failures, ensure you have the necessary permissions to access and modify the files.
Try closing any applications that might be using the files. If a specific file is causing problems, try compressing other files to isolate the issue. As a last resort, consider reinstalling 7-Zip.
File Corruption or Incompatibility
Dealing with corrupted or incompatible files can be frustrating. Corrupted files often result from incomplete downloads or damaged storage media. Incompatibility usually arises when the file format isn’t supported by 7-Zip or the operating system.If you suspect file corruption, try re-downloading the file. If that fails, and you have the original file, try to recover it using data recovery software.
For incompatibility, you might need to convert the file to a supported format using a different compression tool or file converter. Remember, always back up your important files!
7-Zip Application Errors
Occasionally, 7-Zip itself might encounter errors. This could be due to conflicts with other software, outdated versions of 7-Zip, or problems with the application’s installation.If 7-Zip crashes or displays error messages, try restarting your computer. If the problem persists, update 7-Zip to the latest version. If the issue started after installing new software, try uninstalling that software to see if it resolves the conflict.
Reinstalling 7-Zip is also a good troubleshooting step.
7-Zip Mac vs. Other Archiving Tools
Choosing the right archiving tool for macOS can feel like navigating a minefield of options. While 7-Zip offers a robust, open-source solution, it’s crucial to weigh its strengths and weaknesses against other popular alternatives like The Unarchiver and Keka. This comparison will highlight key differences in functionality, ease of use, and system resource consumption.
Performance Comparison of Archiving Utilities
-Zip, known for its compression efficiency on Windows, maintains a strong performance on macOS, especially with its 7z format. However, it might not always outperform other utilities in terms of speed, particularly for less CPU-intensive compression algorithms. The Unarchiver, for example, often boasts faster decompression speeds due to its optimized handling of common archive formats like ZIP and RAR.
Keka, a GUI-based archiver, offers a good balance between speed and compression ratio, depending on the selected algorithm. The actual performance differences often depend on the size and type of files being compressed or extracted, as well as the system’s hardware specifications. Larger files, for instance, will naturally take longer to process, regardless of the software used.
Ease of Use and User Interface
-Zip’s command-line interface might intimidate users unfamiliar with terminal commands, making it less user-friendly than The Unarchiver or Keka. The Unarchiver and Keka provide intuitive graphical user interfaces (GUIs) that simplify the process of creating and extracting archives. Drag-and-drop functionality, clear visual cues, and straightforward options make these tools significantly easier for beginners to use. While 7-Zip’s power lies in its versatility, its lack of a polished GUI can be a significant drawback for casual users.
For power users comfortable with the command line, 7-Zip’s flexibility might outweigh its steeper learning curve.
Feature Set and Supported Formats
-Zip supports a wide range of compression algorithms and archive formats, including its own 7z format, which is often praised for its high compression ratio. However, The Unarchiver and Keka also support a broad spectrum of formats, covering most commonly used archive types. While 7-Zip might offer some less common formats, the practical difference for most users is minimal.
The Unarchiver, in particular, is renowned for its extensive format support. Keka excels in its ability to easily handle split archives and offers options for password protection and self-extracting archives. Therefore, feature parity exists across all three, with minor differences in niche functionality.
Resource Consumption
Generally, all three archiving utilities – 7-Zip, The Unarchiver, and Keka – have relatively low system resource footprints. Significant differences are unlikely to be noticeable during typical usage. However, extremely large archives might lead to higher CPU or memory usage, particularly during compression. The impact on system performance will depend on the system’s specifications and the chosen compression settings.
High-compression algorithms generally require more processing power, while faster algorithms compromise on compression ratios.
Comparison Table
| Feature | 7-Zip | The Unarchiver | Keka |
|---|---|---|---|
| Primary Interface | Command-line (with limited GUI options) | GUI | GUI |
| Ease of Use | Steeper learning curve | User-friendly | User-friendly |
| Compression Speed | Variable, depending on algorithm | Generally fast | Good balance of speed and compression |
| Compression Ratio | High with 7z format | Good | Good |
| Supported Formats | Extensive | Very extensive | Extensive |
| System Resource Usage | Low | Low | Low |
7-Zip Mac Command-Line Interface

The command-line interface (CLI) for 7-Zip on macOS offers a powerful way to interact with the archiving program, especially for scripting and automating tasks. While the graphical user interface (GUI) is user-friendly, the CLI provides more flexibility and control, perfect for advanced users and those who need to integrate 7-Zip into automated workflows. It’s a text-based interface, meaning you interact with it by typing commands into your terminal.Using the 7-Zip CLI requires familiarity with the terminal and basic command-line syntax.
However, the commands themselves are relatively straightforward and consistent across different operating systems, making it relatively easy to learn once you grasp the fundamental concepts. You’ll primarily interact with the `7z` command, followed by various options and arguments to specify the actions you want 7-Zip to perform.
Basic Command Structure
The fundamental structure of a 7-Zip CLI command is as follows: 7z . The `
Automating Archiving Tasks
Automating archiving tasks with 7-Zip’s CLI is achieved through shell scripting. This involves creating a script file (typically with a `.sh` extension) containing a sequence of 7-Zip commands. You can then execute this script to perform the archiving operations automatically. For example, a script could be written to automatically compress all files in a specific directory daily, creating a new archive with a timestamp in the filename.
This can be scheduled using tools like `cron` on macOS.
Common Command-Line Operations
Here are examples of common 7-Zip CLI operations:
Creating an Archive
To create a 7z archive named “myarchive.7z” containing the files “file1.txt” and “file2.txt” with a high compression level, you would use the following command: 7z a -t7z -mx9 myarchive.7z file1.txt file2.txt* a: Specifies the “add” command to create an archive.
-t7z
Specifies the 7z archive format.
-mx9
Sets the maximum compression level to 9 (highest).
Extracting an Archive
To extract all files from “myarchive.7z” to the current directory, use: 7z x myarchive.7z* x: Specifies the “extract” command.
Testing an Archive
To test the integrity of “myarchive.7z”, use: 7z t myarchive.7z* t: Specifies the “test” command to check for errors in the archive.
Listing Archive Contents
To list the contents of “myarchive.7z” without extracting them, use: 7z l myarchive.7z* l: Specifies the “list” command.
7-Zip Mac Integration with Other Applications
- -Zip’s usefulness on macOS extends beyond its core compression capabilities. Its integration with other applications, particularly Finder, significantly streamlines file management and improves overall workflow efficiency. This integration allows for seamless interaction, making 7-Zip a powerful tool within a broader macOS ecosystem.
- -Zip doesn’t directly integrate with macOS in the same way that some native applications do. However, it can be configured to work seamlessly with the Finder, allowing you to right-click files and folders to compress or decompress them using 7-Zip. This eliminates the need to manually open the 7-Zip application each time you need to archive or extract files.
Furthermore, you can configure 7-Zip to handle specific file types, acting as the default compression utility for those types. This level of customization makes 7-Zip highly adaptable to individual user preferences and workflows.
Finder Integration
Configuring 7-Zip to work directly within Finder is straightforward. After installing 7-Zip, you’ll typically find that right-clicking a file or folder presents options to “7-Zip Add to Archive” or “7-Zip Extract Here”. This allows for quick and easy compression and decompression without needing to navigate to the 7-Zip application itself. The exact appearance of these options might vary slightly depending on your macOS version and how 7-Zip was installed, but the functionality remains consistent.
Setting 7-Zip as the Default Archiving Tool
While 7-Zip doesn’t offer a direct setting to become the default archiving tool forall* file types, you can achieve a similar effect by associating specific file extensions with 7-Zip. This involves using macOS’s built-in file association features. For example, you could configure 7-Zip to handle .zip, .7z, or other archive extensions. This means that double-clicking a .zip file would automatically open it with 7-Zip, instead of another application.
The steps to do this typically involve right-clicking a file with the desired extension, selecting “Get Info,” and then changing the “Open with” application to 7-Zip.
Streamlining Workflows with Productivity Tools
-Zip’s command-line interface allows for integration with other productivity tools like Automator or shell scripts. This enables automation of archiving and extraction tasks within larger workflows. For example, you could create an Automator workflow that automatically compresses all files in a specific folder before uploading them to a cloud storage service. Similarly, shell scripts can be used to programmatically compress and decompress files as part of more complex data processing tasks.
This level of automation allows for efficient and repeatable processes, greatly enhancing productivity.
7-Zip Mac Performance Optimization
Getting the most out of 7-Zip on your Mac involves understanding how its settings interact with your system’s resources. Optimizing 7-Zip isn’t just about faster compression; it’s about balancing speed, compression ratio, and the overall health of your system. This section explores strategies to fine-tune 7-Zip for peak performance.Optimizing 7-Zip’s performance on macOS involves a multifaceted approach, considering both software settings and hardware limitations.
By strategically adjusting compression levels and allocating sufficient system resources, you can significantly improve both compression speed and the resulting file size.
Compression Level Settings
-Zip offers various compression levels, each impacting speed and compression ratio. Higher levels achieve smaller compressed files but take longer to process. Lower levels are faster but result in larger files. The optimal setting depends on your priorities. For instance, archiving large video files where storage space is premium, a higher compression level might be worthwhile despite the longer processing time.
Conversely, for quickly backing up numerous small files, prioritizing speed with a lower compression level makes more sense. Experimentation is key to finding the sweet spot for your typical use cases. You can adjust the compression level within 7-Zip’s interface before starting the compression process.
Processor and RAM Allocation
-Zip is a CPU-intensive application. A more powerful processor (higher clock speed and more cores) will directly translate to faster compression and extraction. Similarly, sufficient RAM is crucial. If your system runs low on RAM while 7-Zip is compressing, performance will significantly degrade as the system resorts to using slower virtual memory (swap space on your hard drive).
Monitoring your system’s resource usage (using Activity Monitor on macOS) while 7-Zip is running will help you identify potential bottlenecks. If you consistently observe high CPU or RAM usage during 7-Zip operations, upgrading your system’s hardware might be necessary for significant performance improvements.
Solid State Drive (SSD) Usage
Using an SSD instead of a traditional hard disk drive (HDD) will dramatically improve 7-Zip’s performance, especially for large files. SSDs offer significantly faster read and write speeds compared to HDDs, directly impacting the time it takes to compress and extract files. The difference can be substantial, especially when dealing with many files or very large files. If you’re still using an HDD, upgrading to an SSD will likely be one of the most impactful performance improvements you can make.
Dictionary Size
The dictionary size setting in 7-Zip affects the compression algorithm’s efficiency. A larger dictionary allows for better compression but requires more memory and processing power. Smaller dictionaries are faster but achieve less compression. Experimentation is needed to find the best balance between compression ratio and speed for your system’s capabilities and your typical file types. For example, compressing highly repetitive data, like large text files or images with similar patterns, might benefit from a larger dictionary size.
Multi-core Processing
-Zip effectively utilizes multiple processor cores, allowing for parallel processing during compression and extraction. Ensuring that 7-Zip is allowed to use all available cores is essential for maximizing performance. This setting is typically enabled by default, but it’s worth verifying in 7-Zip’s settings. On systems with multiple cores, you’ll notice a substantial speed increase compared to single-core processing, especially when handling large files.
Background Processes
Minimize the number of applications running in the background while 7-Zip is active. Other resource-intensive programs can compete for CPU and RAM, slowing down 7-Zip’s performance. Closing unnecessary applications before initiating a compression or extraction task can free up valuable resources, leading to noticeable speed improvements.
7-Zip Mac Future Developments and Updates: 7zip Mac
Predicting the future of any software is inherently speculative, but based on current trends and user feedback, we can make some educated guesses about potential future developments for 7-Zip on macOS. The developers have consistently demonstrated a commitment to improving performance and adding features based on user requests, so we can expect continued refinement and enhancements.The core strength of 7-Zip lies in its robust compression algorithms and its cross-platform compatibility.
Future updates will likely build upon this foundation, focusing on performance optimization, improved user interface elements, and enhanced integration with the macOS ecosystem. Addressing user-reported bugs and improving stability will also remain a priority.
Enhanced macOS Integration
-Zip’s current macOS integration is functional but could be improved. Future updates might see deeper integration with Finder, allowing for right-click context menu options for compression and extraction directly from Finder windows. This would streamline the user experience significantly, making 7-Zip even more user-friendly for those less comfortable with command-line tools. We might also see better integration with macOS’s system-wide sharing capabilities, enabling easier sharing of compressed files through various channels.
For example, imagine directly compressing a file and then seamlessly sharing it via AirDrop.
Improved User Interface
While 7-Zip’s interface is functional, it’s not the most visually appealing or intuitive. Future versions could incorporate a modernized interface with a cleaner layout and improved usability. This could include features such as drag-and-drop functionality for easier file management, improved progress bar visuals, and more informative error messages. Consider the evolution of other archiving tools, such as the improved UI seen in recent versions of WinRAR, as a potential direction for 7-Zip’s development.
Support for Newer Compression Algorithms, 7zip mac
The world of data compression is constantly evolving. Future updates could incorporate support for newer, more efficient compression algorithms. This would result in smaller file sizes and faster compression/decompression speeds. The adoption of algorithms like Zstandard (zstd), which offers a compelling balance of speed and compression ratio, would be a logical progression. Similar to how 7-Zip has historically added support for newer standards, such as LZMA2, we can expect this trend to continue.
Improved Multi-Core Processing
-Zip’s current multi-core support could be further optimized. Future updates could leverage the full potential of modern multi-core processors, leading to significant performance improvements, particularly for large files. This would involve fine-tuning the internal algorithms to distribute the workload more efficiently across multiple CPU cores. We’ve seen this kind of optimization in other applications, such as video editors, and similar gains could be realized in 7-Zip.
Final Review

So there you have it – a comprehensive look at 7zip for Mac. From simple compression to complex command-line operations, 7zip offers a robust and efficient solution for all your archiving needs. By understanding its features and capabilities, you can significantly improve your file management workflow and enhance your overall productivity. Now go forth and conquer those files!
FAQ Corner
Is 7zip Mac safe to use?
Yes, 7zip is generally considered safe when downloaded from the official website. Always be cautious about downloading from unofficial sources.
Can 7zip Mac handle large files?
Absolutely! 7zip is designed to handle even the largest files efficiently, and it also allows you to split large files into smaller, more manageable parts.
What are the system requirements for 7zip Mac?
7zip is relatively lightweight, but it’s best to check the official website for the most up-to-date system requirements. Generally, it runs smoothly on most modern Macs.
Can I integrate 7zip with other apps like Finder?
While not directly integrated, you can configure 7zip to be the default application for opening certain archive types, effectively integrating it into your workflow.
How do I update 7zip Mac?
Check the official website for updates. They usually provide a simple installer for updating to the latest version.