Zoom Download Windows: So, you need to get Zoom up and running on your Windows machine? No sweat! This guide walks you through downloading, installing, troubleshooting, and even optimizing Zoom for the best possible video conferencing experience. Whether you’re a total newbie or just need a refresher, we’ve got you covered. We’ll tackle everything from official download sources to fixing those pesky download errors, making sure your virtual meetings run smoothly.
We’ll cover the official download process, system requirements, and how to verify the download’s integrity. Then we’ll dive into troubleshooting common problems like slow downloads and corrupted files. We’ll also compare downloading from official vs. unofficial sources, highlighting the importance of security. Finally, we’ll explore optimizing Zoom’s performance, managing updates, and boosting your video and audio quality.
Official Zoom Download Process for Windows
Downloading Zoom for Windows is a straightforward process, but ensuring you get the official version from the correct source is crucial for security. This section details the steps involved, system requirements, and how to verify the downloaded file’s integrity.Downloading Zoom from the official website is the only way to guarantee you’re not installing malware. The process is quick and simple, and this guide will walk you through it.
Zoom Download Steps for Windows
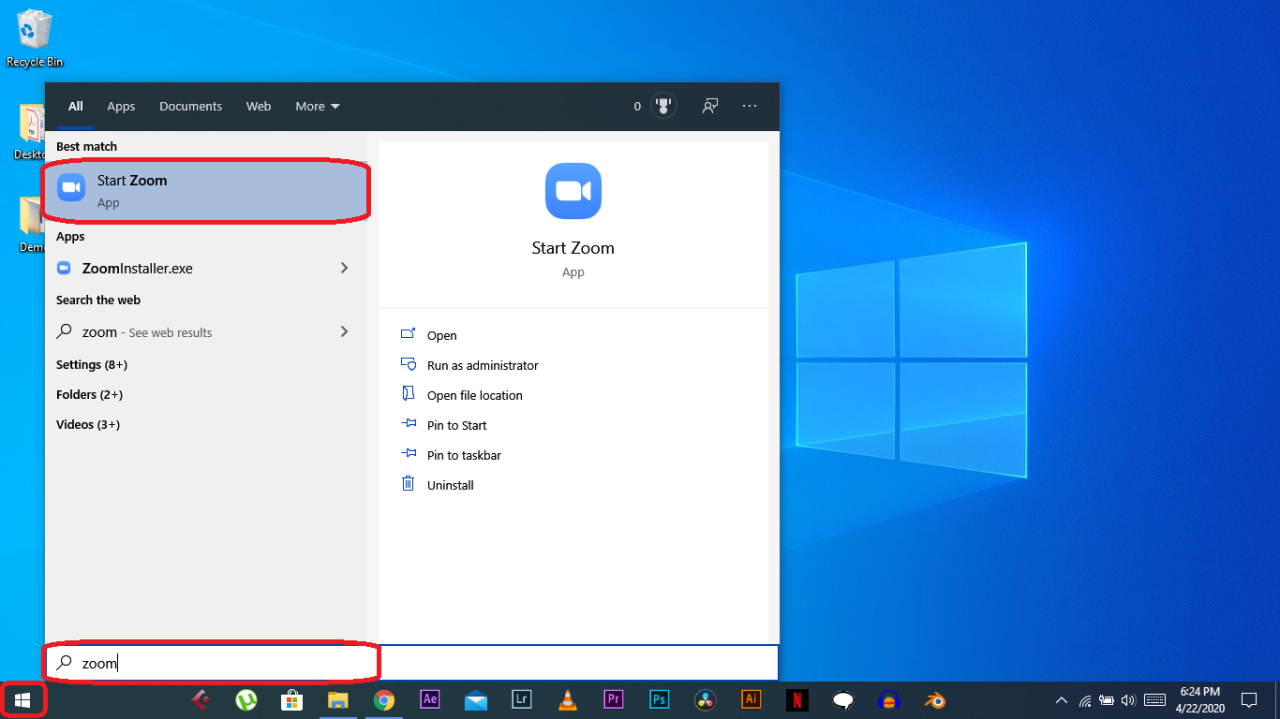
The official Zoom download process begins at the Zoom website. First, navigate to the official Zoom website using your preferred web browser. Look for a prominent “Download” button, usually located near the top of the page. Clicking this button will initiate the download process. The installer file will likely be named something like `ZoomInstaller.exe`.
Once downloaded, locate the file and double-click it to start the installation. Follow the on-screen instructions, accepting the license agreement and choosing your preferred installation location. The installation should be complete in a few minutes.
System Requirements for Zoom on Windows
Before attempting to install Zoom, it’s important to ensure your Windows system meets the minimum requirements. Running Zoom on a system that doesn’t meet these specifications can lead to performance issues, including lag, freezing, and crashes.
The minimum requirements generally include:
- Operating System: Windows 7, 8, or 10 (or later)
- Processor: At least a dual-core processor
- RAM: At least 2 GB of RAM
- Internet Connection: A stable internet connection with sufficient bandwidth for video conferencing
While these are minimum requirements, for a smoother experience, especially with high-resolution video or multiple participants, a more powerful system is recommended. For example, a quad-core processor and 4GB of RAM would provide a much better experience.
Verifying Zoom Installer Integrity
Downloading software directly from the official website significantly reduces the risk of malware, but verifying the file’s integrity provides an extra layer of security. While Zoom doesn’t provide a checksum directly on their download page, you can utilize third-party tools to verify the file’s integrity. This process involves comparing a cryptographic hash of the downloaded file with a known good hash.
You can find resources online that provide the expected hash values for different versions of the Zoom installer. A mismatch indicates a potential problem with the downloaded file.
Troubleshooting Zoom Download Issues on Windows

Downloading the Zoom client should be a breeze, but sometimes things go sideways. This section covers common problems you might encounter while downloading Zoom on your Windows machine and offers practical solutions to get you up and running quickly. We’ll tackle everything from slow downloads to corrupted installer files.
Common Zoom Download Errors and Solutions
A variety of issues can crop up during the Zoom download process. These range from simple network hiccups to more complex problems with your system’s configuration. Understanding these common errors and their solutions is key to a smooth installation.
- Error: “Download failed” or similar generic error messages. This often points to a temporary network problem. Try refreshing your browser, checking your internet connection, and restarting your computer. If the problem persists, try a different browser or a different network (e.g., switch from Wi-Fi to Ethernet).
- Error: Specific HTTP error codes (e.g., 404, 500). These codes indicate problems on the Zoom server side or with the download link itself. Try again later. If the problem continues, contact Zoom support for assistance.
- Error: Antivirus or firewall interference. Your security software might be blocking the download. Temporarily disable your antivirus and firewall, download Zoom, and then re-enable your security software. If this works, you may need to add Zoom to your security software’s exception list.
- Error: Insufficient disk space. Zoom requires a certain amount of free space on your hard drive. Check your available disk space and delete unnecessary files to free up space before attempting the download again. The Zoom installer is relatively small, but ensure you have enough space for the full application after installation.
Resolving Slow Zoom Download Speeds
A slow download can be incredibly frustrating. Several factors can contribute to this, from network congestion to your computer’s processing power. Addressing these factors can significantly improve download speeds.
- Network Congestion: High network traffic can slow downloads. Try downloading during off-peak hours or connecting to a different network with less congestion.
- Background Processes: Close unnecessary applications running in the background. These programs can consume bandwidth and system resources, slowing down your download.
- Internet Service Provider (ISP) Issues: Contact your ISP if you suspect problems with your internet connection. They can help diagnose and resolve network issues on their end.
- Restart your router and modem: A simple reboot can often resolve temporary network glitches that affect download speeds.
Fixing a Corrupted Zoom Installer File
A corrupted installer file will prevent successful installation. This usually manifests as an error during the installation process. The solution is to download the installer again.
- Redownload the installer: The simplest and most effective solution is to completely delete the existing installer file and download a fresh copy from the official Zoom website. Ensure you are downloading from the official source to avoid malicious software.
- Clear your browser’s cache and cookies: Sometimes, corrupted cache files can interfere with downloads. Clearing your browser’s cache and cookies can resolve this issue. This will remove temporary files your browser uses, providing a clean slate for the download.
- Try a different browser: If you continue to experience problems, try downloading the installer using a different web browser (e.g., Chrome, Firefox, Edge).
Comparing Different Zoom Download Sources

So, you’re ready to download Zoom, but where’s the best place to grab it? Choosing the right download source is crucial for both a smooth installation and, more importantly, your computer’s security. Let’s break down the differences between official and third-party sources.Downloading Zoom from the official website versus a third-party site might seem like a small detail, but it’s actually a big deal for your computer’s safety and the overall Zoom experience.
The differences boil down to security, reliability, and the overall user experience.
Security Risks of Downloading Zoom from Unofficial Websites
Downloading Zoom from unofficial sources significantly increases the risk of malware infection. These sites might host modified versions of the Zoom installer, containing malicious code that can steal your data, compromise your system, or even use your computer for nefarious activities like cryptocurrency mining. Think of it like this: you wouldn’t download a pirated movie from a shady website – the same principle applies to software.
You’re essentially taking a gamble with your computer’s security. Unofficial sources often lack the security measures and verification processes of the official Zoom website, making them vulnerable to malicious actors. These actors could easily inject malware into the installer, giving them access to your system once you run it. The consequences could range from data breaches to complete system failure.
Reasons to Use the Official Zoom Website
The official Zoom website (zoom.us) is the only guaranteed source for the legitimate, unaltered Zoom client. Downloading from zoom.us ensures you’re getting the software directly from the source, free of any hidden malware or modifications. This guarantees a secure and reliable installation. Furthermore, the official website provides support and resources if you encounter any issues during the download or installation process.
The official site also offers the latest version of Zoom, complete with bug fixes and security updates, ensuring you have the best possible experience. Using the official website reduces the risk of encountering compatibility issues or performance problems associated with unofficial versions. Finally, using the official website is the best way to support the developers and maintain a healthy software ecosystem.
This helps them to continue providing updates and improvements to the application.
Zoom Installation on Different Windows Versions
Installing Zoom on Windows is generally straightforward, but minor differences exist depending on your operating system version. This section details the installation process for Windows 10, Windows 11, and older versions, highlighting any compatibility issues and providing solutions. We’ll also cover uninstalling previous versions to ensure a clean installation.The core installation process remains consistent across Windows versions. You download the installer, run the executable, and follow the on-screen prompts.
However, older systems might require slightly more attention to system requirements and potential compatibility issues.
Zoom Installation on Windows 10
Windows 10 users typically experience a smooth installation. The installer is compatible with most configurations, and the process involves simply running the downloaded executable file (.exe) and clicking through the installation wizard. Users should ensure they have sufficient disk space and an active internet connection. Any conflicts with existing applications are usually resolved automatically by the installer.
If problems occur, restarting the computer after installation often resolves minor glitches.
So, you need to download Zoom for Windows? Pretty standard stuff, right? But if you’re into 3D modeling, maybe check out fusion360 while you’re at it – it’s awesome for prototyping designs. Anyway, back to Zoom; once you’ve got that downloaded, you’re good to go for your next virtual class or meeting.
Zoom Installation on Windows 11
Similar to Windows 10, the Zoom installation on Windows 11 is generally trouble-free. Windows 11’s improved compatibility with newer software usually results in a seamless installation experience. The process mirrors that of Windows 10: download the installer, run the file, and follow the prompts. Windows 11’s security features might prompt for confirmation during the installation, which is a normal part of the process.
Zoom Installation on Older Windows Versions (Windows 7, 8, and 8.1)
Installing Zoom on older Windows versions like Windows 7, 8, and 8.1 might present some challenges. While Zoom officially supports these versions, they might lack some of the newer features or optimizations. It’s crucial to ensure that your system meets the minimum system requirements specified by Zoom. Older systems might require more processing power and RAM to run Zoom smoothly.
Furthermore, security updates and patches might be limited on these older operating systems, potentially increasing vulnerability to security risks. It is highly recommended to keep your operating system and Zoom application updated for optimal performance and security.
Uninstalling Previous Zoom Versions
Before installing a new version of Zoom, uninstalling any previous versions is strongly recommended. This prevents conflicts and ensures a clean installation. This can be done through the Windows Control Panel. Navigate to “Programs and Features” (or “Add or Remove Programs” in older versions), locate Zoom, select it, and click “Uninstall.” Follow the on-screen instructions to complete the uninstallation.
Restarting your computer after uninstalling is a good practice to ensure all files and processes related to the previous version are removed. This step is crucial for preventing issues such as conflicting settings or outdated files interfering with the new installation.
Managing Zoom Updates on Windows
Keeping your Zoom client up-to-date is crucial for accessing the latest features, security patches, and performance improvements. Zoom typically handles updates automatically in the background, ensuring you always have the best experience. However, there are ways to manually check for updates and even control the automatic update process if needed.Zoom’s automatic update feature works silently and efficiently. When a new version is available, Zoom will download and install it during periods of inactivity, typically when the application is closed or not in use.
You’ll usually see a brief notification indicating the update is in progress or has completed. This seamless process minimizes disruption to your workflow. The update process itself is generally quick, but the download time will depend on your internet connection speed and the size of the update. Occasionally, you might encounter a prompt to restart Zoom to fully apply the update.
Automatic Zoom Updates on Windows
Zoom automatically checks for updates at regular intervals. If a new version is detected, the download and installation process begins automatically. This background update process ensures that you’re always using the latest and most secure version of the software. The frequency of these automatic checks isn’t publicly specified by Zoom, but generally, it happens fairly often, ensuring timely updates.
If you’re concerned about bandwidth usage, note that updates are typically downloaded and installed only when the Zoom client isn’t actively running, minimizing disruption to your internet usage.
Manually Checking for and Installing Zoom Updates
While automatic updates are generally preferred, you can manually check for updates at any time. To do this, open the Zoom application, click your profile picture in the top right corner, and select “Check for Updates.” Zoom will then check for a newer version. If one is available, you’ll be prompted to download and install it. The process is similar to the automatic update, requiring a restart of the application to complete the installation in most cases.
Disabling Automatic Zoom Updates
While generally recommended to keep automatic updates enabled for security and feature access, you can disable this feature if absolutely necessary. However, disabling automatic updates means you’ll need to manually check for updates regularly, increasing the risk of using an outdated and potentially less secure version. There’s no direct option within the Zoom client itself to completely disable automatic updates.
The best approach is to carefully monitor the available updates and decide whether or not to install them manually. Consider the trade-offs between convenience and security before opting out of automatic updates.
Zoom Features and Functionality Overview
Okay, so you’ve successfully downloaded and installed Zoom. Now what? Let’s dive into the core features that make Zoom such a popular video conferencing platform. This overview will cover the basics of video conferencing, screen sharing, chatting, and the different types of meetings you can create.Zoom offers a robust suite of tools designed for seamless communication and collaboration.
Its intuitive interface makes it accessible to both tech-savvy users and those less familiar with video conferencing software. Understanding these features will empower you to utilize Zoom effectively for various purposes, from casual chats to formal business meetings.
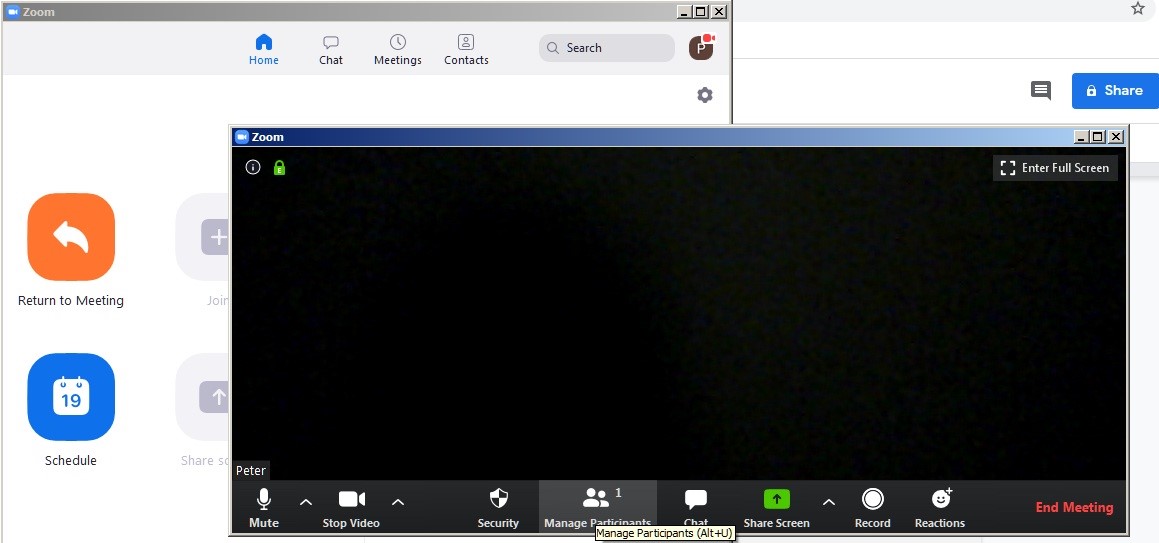
Video Conferencing
Zoom’s video conferencing capabilities are its bread and butter. High-quality video and audio are crucial, and Zoom generally delivers on this front. Beyond basic video calls, you can customize your video settings, including enabling or disabling your camera, adjusting video resolution, and choosing virtual backgrounds. Features like speaker view and gallery view allow you to focus on either the active speaker or see all participants simultaneously.
You can also easily mute and unmute yourself and others, and utilize the “raise hand” feature to politely request attention during a meeting. The ease of starting and joining meetings is a key strength.
Screen Sharing
Screen sharing is a powerful feature allowing you to share your desktop, a specific application window, or even just a single file with other participants. This is invaluable for presentations, collaborative work sessions, and remote teaching. While sharing your screen, you can also annotate on the shared content using various tools like drawing, highlighting, and adding text. Zoom also allows for co-annotation, enabling multiple participants to collaborate on the same document or presentation in real-time.
The control over what’s shared and the annotation tools significantly enhance the collaborative experience.
Chat Functionality
Beyond video and audio, Zoom offers a robust chat feature. You can send private messages to individual participants or broadcast messages to the entire group. This allows for parallel communication during a meeting, making it possible to ask questions, share links, or make comments without interrupting the main conversation. The chat history is also saved, providing a record of the discussion after the meeting concludes.
This is particularly useful for keeping track of decisions made or action items agreed upon.
Meeting Types
Zoom offers a variety of meeting types to suit different needs. These include:
- Instant Meetings: These are quick meetings that can be started immediately without scheduling.
- Scheduled Meetings: These meetings are planned in advance with a specific date, time, and duration. They can be recurring or one-time events.
- Webinar: Webinars are large-scale online events designed for broadcasting information to a large audience. They typically involve a presenter and a panel of speakers, with the audience participating through Q&A or chat.
- Personal Meeting Room (PMR): Each Zoom user has a unique PMR, a permanent meeting link that can be used for quick, recurring meetings.
The choice of meeting type depends on the context and the intended audience. Understanding the differences allows you to select the most appropriate option for your specific needs.
Security Considerations for Zoom on Windows: Zoom Download Windows

Securing your Zoom experience on Windows involves a multi-faceted approach, encompassing both individual settings and an understanding of the platform’s inherent security features. Neglecting these aspects can expose your data and compromise your privacy, potentially leading to serious consequences. This section details key security measures to enhance your Zoom usage.Protecting your privacy and data while using Zoom on Windows requires proactive measures.
These steps, when implemented correctly, significantly reduce your vulnerability to various security threats. Remember that security is an ongoing process, requiring vigilance and regular updates.
Zoom Security Settings
Zoom offers a range of security settings that can be customized to suit your needs and risk tolerance. These settings control various aspects of your meetings, from password protection to participant permissions. Understanding and effectively utilizing these features is crucial for maintaining a secure environment. For example, enabling waiting rooms allows you to control who enters your meeting, preventing uninvited guests from joining.
Similarly, disabling screen sharing for participants prevents unauthorized access to your screen. The use of strong, unique passwords for your Zoom account and meetings further strengthens your security posture. Consider utilizing two-factor authentication (2FA) for an extra layer of protection, adding a significant hurdle for potential attackers. Regularly reviewing and adjusting these settings based on your current needs is a best practice.
Importance of Zoom Updates
Keeping your Zoom client updated is paramount for maintaining a secure environment. Zoom regularly releases updates that address security vulnerabilities and improve overall performance. These updates often include patches that fix critical bugs that could be exploited by malicious actors. Failing to update your Zoom client leaves your system vulnerable to attacks, potentially exposing your data and compromising the confidentiality of your meetings.
Therefore, enabling automatic updates is highly recommended to ensure you always have the latest security patches installed. Checking for updates manually on a regular basis, even if automatic updates are enabled, is also a good security practice.
Managing Participant Permissions and Meeting Access
Controlling participant permissions is a vital aspect of Zoom security. Zoom allows you to granularly control what actions participants can perform during a meeting. For instance, you can disable screen sharing for participants, preventing unauthorized access to sensitive information displayed on your screen. Similarly, you can mute participants upon entry, reducing disruptions and background noise. The ability to remove participants is also crucial for managing disruptive behavior or unauthorized access.
Restricting file sharing and chat functionality can also enhance security, particularly in sensitive meetings. Careful consideration of these permissions, tailored to the specific context of each meeting, is essential for maintaining a secure environment. Prioritizing security settings based on the sensitivity of the information shared during meetings is a key element of this process.
Optimizing Zoom Performance on Windows
Okay, so you’ve got Zoom downloaded and installed, but your calls are lagging, your audio’s crackly, or your video looks like a potato. Don’t worry, we’ve all been there. Let’s dive into some tips and tricks to boost your Zoom performance and make those virtual meetings a whole lot smoother. We’ll cover optimizing your video and audio settings, troubleshooting common issues, and adjusting your system settings for a better overall Zoom experience.
Improving Video and Audio Quality
High-quality video and audio are key for a positive Zoom experience. Poor quality can be distracting and frustrating for both you and the other participants. Achieving optimal quality involves a combination of hardware and software adjustments. First, ensure your microphone and webcam are correctly selected within Zoom’s settings. Then, consider factors like lighting—good lighting significantly improves video quality—and background noise.
A quiet environment minimizes audio distractions. Experiment with different resolutions and frame rates within Zoom’s settings to find the best balance between quality and bandwidth usage. Lowering the resolution or frame rate can reduce bandwidth consumption, which is particularly helpful if you have a slower internet connection. For audio, consider using headphones with a built-in microphone to reduce echo and background noise.
Resolving Lag, Poor Connectivity, and Audio Problems
Lag, poor connectivity, and audio problems are common Zoom headaches. Let’s address them systematically. Lag often stems from insufficient bandwidth. Check your internet speed using a speed test website (like speedtest.net) to ensure it’s sufficient for video conferencing. Close unnecessary applications running in the background to free up bandwidth.
Restarting your router or modem can sometimes resolve connectivity issues. If audio problems persist, check your microphone and speaker settings in both Windows and Zoom. Ensure the correct devices are selected and the volume levels are appropriately adjusted. Try a different USB port for your microphone or webcam; sometimes a different port can improve performance. If the problem persists after these steps, consider updating your audio drivers.
Optimizing System Settings for Better Zoom Performance, Zoom download windows
Your Windows system settings can significantly impact Zoom’s performance. Ensure your operating system is up-to-date with the latest patches and updates. These updates often include performance improvements and bug fixes. Close unnecessary background applications to free up system resources. High CPU and RAM usage by other programs can lead to lag during Zoom calls.
Consider adjusting your power settings to favor performance over power saving. This ensures your computer is using its full processing power, which is beneficial for video conferencing. If you’re still experiencing performance issues, consider temporarily disabling any antivirus or firewall software that might be interfering with Zoom’s functionality. Remember to re-enable them after your meeting. Lastly, ensure your graphics drivers are up-to-date; outdated drivers can cause video issues.
Creating a Visual Guide to Zoom Download and Installation
This section provides a visual guide to downloading and installing Zoom on Windows, making the process easier to understand and follow. We’ll present a flowchart and a table summarizing the steps, along with descriptions to clarify each stage. This will help you navigate the installation quickly and efficiently.
Zoom Download and Installation Flowchart
A flowchart visually represents the sequential steps involved in downloading and installing Zoom. It’s a great way to quickly grasp the overall process before diving into the details. Imagine a flowchart with boxes connected by arrows. The boxes would represent actions, such as visiting the Zoom website, clicking the download button, and running the installer. Arrows indicate the flow from one step to the next.
Step-by-Step Zoom Download and Installation Guide
The following table provides a detailed, step-by-step guide to downloading and installing Zoom on Windows, complete with descriptions and visual representations of key screens. Remember to always download from the official Zoom website to avoid potential security risks.
| Step | Description | Screenshot Description | Notes |
|---|---|---|---|
| 1. Navigate to the Zoom Website | Open your web browser (e.g., Chrome, Edge, Firefox) and go to zoom.us. | Screenshot showing the Zoom homepage, with the prominent “Download” button clearly visible. The screenshot should show a clean, uncluttered version of the homepage. | Ensure you are on the official Zoom website to avoid malicious downloads. |
| 2. Click the Download Button | Locate the “Download” button (usually prominent and clearly labeled) and click it. | Screenshot of the Zoom homepage with the “Download” button highlighted, possibly showing a mouse cursor hovering over it. | The button’s exact location may vary slightly depending on the website’s design, but it’s typically near the top or center. |
| 3. Select the Windows Installer | Choose the installer appropriate for your Windows version (32-bit or 64-bit). Your system will indicate this in your system settings. | Screenshot showing the download options page, with the Windows installer clearly indicated. The screenshot should include the file size and version number. | Downloading the wrong installer might lead to compatibility issues. |
| 4. Run the Installer | Once the download is complete, locate the downloaded file (usually a .exe file) and double-click it to run the installer. | Screenshot of the file explorer window showing the downloaded Zoom installer file. The file should be clearly identifiable. | You may need administrator privileges to run the installer. |
| 5. Follow the On-Screen Instructions | The installer will guide you through the installation process. You might need to accept the license agreement and choose installation location. | Screenshot showing a typical installer window with options like “Next,” “Install,” “Agree,” and possibly a progress bar. | Carefully read and understand the license agreement before proceeding. |
| 6. Launch Zoom | Once the installation is complete, you can launch Zoom from your desktop shortcut or the Start Menu. | Screenshot of the Zoom application launching, possibly showing the login screen. | You may be prompted to sign in or create an account. |
Addressing User Queries Related to Zoom Download
So you’re ready to jump into the world of Zoom, but have a few questions about the download and installation process? It’s totally understandable – getting started with new software can sometimes feel a bit overwhelming. This section aims to clarify some common concerns and get you up and running smoothly. We’ll address frequently asked questions to ensure a hassle-free download and installation experience.
Common Zoom Download Questions and Answers
This section provides concise answers to frequently asked questions regarding the Zoom download and installation process for Windows users. Understanding these points will streamline your setup and help you avoid potential issues.
- Where can I download Zoom for Windows? The safest and most reliable place to download Zoom is directly from the official Zoom website. Avoid third-party websites or download links from untrusted sources to prevent malware or viruses.
- What are the system requirements for running Zoom on Windows? Zoom generally requires a reasonably modern Windows operating system (Windows 7 or later is usually recommended), a decent internet connection, and a functioning microphone and speakers or a webcam (depending on your needs). Specific requirements can be found on the official Zoom website’s system requirements page.
- How long does the Zoom download take? The download time depends on your internet connection speed. A high-speed connection will complete the download quickly, while a slower connection may take longer. You’ll see a progress bar during the download, indicating how much time is remaining.
- What should I do if the Zoom download is slow or interrupted? If your download is slow, check your internet connection speed and try again later. If the download is interrupted, try restarting the download from the official Zoom website. You might also want to temporarily close other applications that are using your internet bandwidth.
- What happens after I download the Zoom installer? After downloading the installer, simply double-click the executable file (it usually has a .exe extension). Follow the on-screen instructions to install Zoom on your Windows computer. This involves accepting the license agreement and choosing an installation location.
- How do I uninstall Zoom if I need to? To uninstall Zoom, go to your Windows Control Panel, select “Programs and Features” (or “Add or Remove Programs”), find Zoom in the list, and click “Uninstall.” Follow the on-screen prompts to complete the uninstallation process.
- What if I encounter an error during the Zoom download or installation? If you experience an error, check your internet connection, ensure you have sufficient disk space, and try restarting your computer. If the problem persists, consult the Zoom support website for troubleshooting assistance or contact Zoom’s customer support.
- Is the Zoom download safe? Downloading Zoom from the official website is safe. However, always be cautious about downloading software from unofficial sources, as these could contain malware or viruses.
- Can I download Zoom on multiple computers? Yes, you can download and install Zoom on multiple computers using the same Zoom account. This allows you to access your meetings and recordings from various devices.
- What file type is the Zoom installer? The Zoom installer for Windows is typically a Windows executable file, often with the extension “.exe”.
Final Wrap-Up
Getting Zoom installed on your Windows PC shouldn’t be a headache. By following the steps Artikeld in this guide, you’ll be able to download, install, and optimize Zoom quickly and safely. Remember to always download from the official source to avoid security risks and keep your Zoom client updated for the best features and security patches. Now go forth and conquer those virtual meetings!
Quick FAQs
Can I download Zoom on an older Windows version like Windows 7?
While Zoom officially supports more recent Windows versions, older versions might work with some limitations. Check Zoom’s system requirements for compatibility.
What if my download gets interrupted?
Most browsers will resume downloads automatically. If not, delete the partially downloaded file and start again.
How much storage space does Zoom need?
The installer is relatively small, but you’ll need enough space for the program files and any recordings you might save.
My Zoom keeps crashing. What should I do?
Try restarting your computer, checking for updates, or reinstalling Zoom. If the problem persists, contact Zoom support.
Is it safe to download Zoom from a torrent site?
Absolutely not! Stick to the official Zoom website to avoid malware and viruses.